


HVAC Maintenance Tips
It’s definitely that time of the year… June has come & gone, but the heat is here to stay. I recently had an issue with the air conditioning at a rental property and thought I’d share a few tips I’ve learned over the years for troubleshooting cooling issues and HVAC maintenance.
1) Check The Furnace Filter
As simple as it may sound, a dirty air filter in your furnace can cause your HVAC system to perform inefficiently and lead to higher utility bills, accelerated wear & tear, and possible nonperformance. I make a point to change furnace filters at my properties at least twice per year… once prior to running the furnace in the Winter, and again in the Spring prior to switching over to the cooling cycle. It’s a good idea to periodically check the filter throughout the year to insure the system isn’t running with a dirty filter. This twice per year rule is a good habit for maintaining basic system health and air purity.
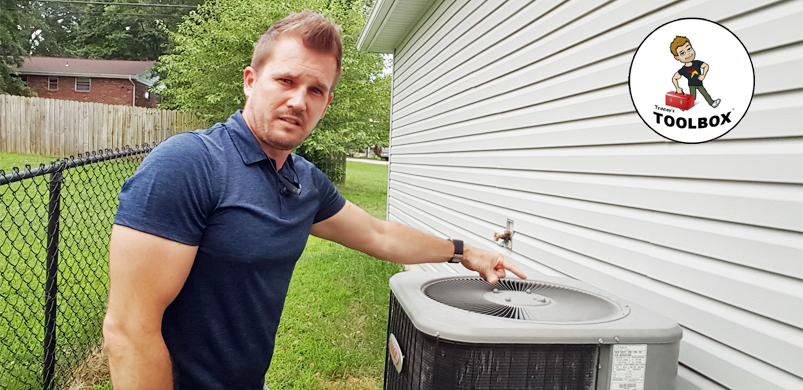
2) Clean Your Central Air Unit
Your central air conditioning unit creates a continuous air flow through it’s outer shell. The fan at the top of the unit pulls air through the radiator vents as it condenses the coolant cycling through the line-set. The line set is the set of copper tubes that run from the central air unit outside to the furnace inside and transports the coolant between the two systems. (See photo 3) Obviously, over time these radiator vents will become clogged with everything from dust particle build up to pollen, grass, bugs, leaves and other trash. It’s important to flush the rows of vents that form the outer shell at least once per year, preferably before initial use. (see photo 1)
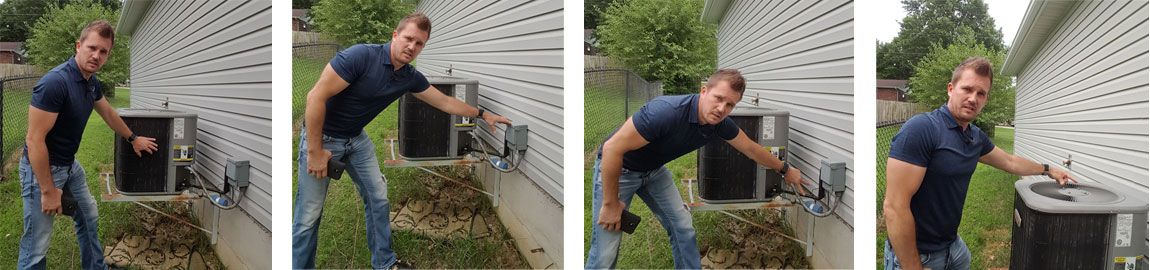
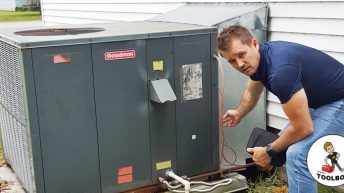
Begin by turning off power to the unit at the disconnect breaker box that is usually mounted on the house near the unit. (See photo 2) Once you’ve confirmed that power to the unit is off, unscrew the protective grate over the top of the unit in order to access the inside components. (See photo 4) The fan will be attached, so carefully shift the cover to the side to allow enough room to reach inside of the shell. (If the power wires attach to the fan with a plug, disconnect the plug to allow complete removal of the lid and fan)
Next, with a garden hose & spray nozzle, begin spraying water through the rows of vents in the outer casing and flush each section in reverse direction (inside out) of the operational air flow. It may be necessary to alternate back & forth between flushing outward to reversing the process and hosing the vents from the outside in an inward direction until the radiator vent shell is visually clean and clear. Finally, re-position the fan lid, re-attach the screws, and restore power to the unit at the disconnect box. Other than possibly replacing the fan, this cleaning procedure will be about the only maintenance a non-expert will be able to conduct to the exterior central air unit.
3) Clean The A-Coil On The Furnace
Unfortunately, after addressing steps 1 & 2 above, my central air unit continued to freeze up and would not cool the home. It had been a while since I encountered this issue and I was almost to the point of writing the issue off as low coolant level and scheduling an appointment for an HVAC technician to add coolant. Right before making the appointment I remembered one other element I had forgotten to check… the A-coil. If you follow the large and small copper tubes that run from outside at the central air condenser into your building (see photo 3), you’ll find that these lines eventually attach to your furnace at the opposite ends.
Once you have located where these lines attach to your furnace, cut power to the furnace at the interior shut off switch or disconnect box located somewhere nearby. You can also cut the power to the furnace at your main breaker box. At this point things can get a little tricky depending on the age of your furnace and other factors affecting how the system was initially installed. What we’re hoping for is some form of an access panel and/or a section of duct work that can be easily disconnected in order to gain access to the system’s A-coil.
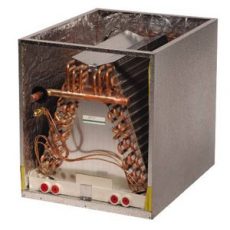
As the name suggests, the A-coil is shaped like the letter A and can accumulate a build up of dust that resembles various thicknesses of lint from a dryer filter. Due to the direction of airflow over the coil, one side will usually collect much more buildup than the other… and in my experience it’s always the side hardest to reach! In the case of my system there was no real access panel, only a small vent cover on one side of the larger trunk line encasing the coil. When I removed the vent cover it provided reasonable access to the closest side of the coil. I wasn’t fully able to reach the opposite side of the coil (which was the dirty side) so I had to disconnect one of the duct vents closest to that area and reach in from that direction. Once I had access to both sides of the A-coil, I used a $7.00 can of spray foam cleaner specifically designed for this purpose (available at Lowes or Menards) to clean the vents on the A-coil. Simply spray the cleaner uniformly over the coil and it will expand into the nooks & crevices as foam that ultimately dissolves the dirt buildup and eventually washes away with naturally occurring condensation. This final step solved my problem and the system has been successfully cooling the house for several weeks now with no further issues… yay!
If you are unable or uncomfortable attempting the above steps, everything mentioned can be completed by an HVAC technician as part of a service call or yearly HVAC maintenance program. If you are experiencing continued issues such as poor or no cooling and/or freezing of the central air unit outside, it is likely that your system may be low on coolant or experiencing a more serious issue. In either case the expertise of a professional will be needed, but at least you know you’ve done everything possible to insure it wasn’t just a simple fix.


Thank you for educating me. Air conditioning repair Jefferson Owens Heating & Cooling is a high-tech customer-oriented heating & air conditioning company. We are utilizing well over a quarter-century of our experience and knowledge and have teamed our customer comes-first mentality with the industry’s best experts, top manufacturers, and state-of-the-art technologies. Here you can visit our site https://owensheatingcooling.com/